I recently upgraded from Manga Studio EX to the new Clip Studio EX. It’s mostly the same, except for a new Animation feature. I’ve been exploring animation as a way to make my blog posts more visually interesting. I found Clip Studio EX easy enough for beginners to do simple animations. Here are two examples of blog posts with animations:
If you’re like me, with no background in Animation and want to start Animating, you’ve come to the right place! I’m going to show you how easy it is to create a simple 2-second animation.

Before we begin, here’s what you’ll need…
- Clip Studio Software
- Some experience in using a graphics software like Photoshop, Manga Studio or Clip Studio
- Passion to learn animation
Understand the interface: Layers & Timeline
Once you open up Clip Studio, you can activate the timeline section by selecting Window > Timeline from the Main Menu.
Timeline consists of “frames”. Animating in Clip Studio is about doing the drawing on layers, and filing them in the appropriate frames on the timeline.
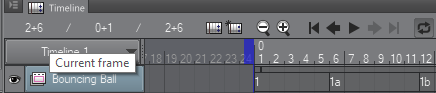
In the Timeline above:
* There are 12 Frames
* Layer 1 is filed into Frame 1
* Layer 1a is filed into Frame 6
* Layer 1b is filed into Frame 12
Don’t worry if it’s not making complete sense. For now just remember that you draw on Layers and add them to Frames on the timeline.
Create a New Animation:
To create a new Animation, go to File > New and select the Animation option:
For our simple animation, the main thing to note is how many frames per second. the more number of frames the smoother you can make the animation.
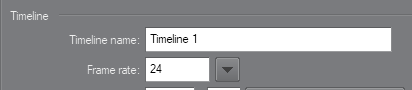
I’m going to leave it at 24.
Create Key Frames of your animation
The first thing I’ll do is create “Key Frames” of my animation. A “Key Frame” is a starting and end point of a transition in the animation.
For my bouncing ball animation, here are the starting and end points:

So I’m going to add the first Layer into Second 1 Frame 1. To do this I right click on Frame 1 and select 1.
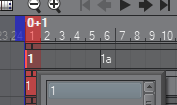
Similarly I add Second Layer into Second 2 Frame 1, and Third Layer into Second 2 Frame 24.
This is how my timeline looks:

Create in between Frames
For my animation to look smoother, I need to create the in between frames
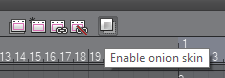
The first thing I’ll do is enable Onion Skin. The Onion Skin allows you to see the previous and next frame of the active frame. You’ll see an icon for this on the timeline:
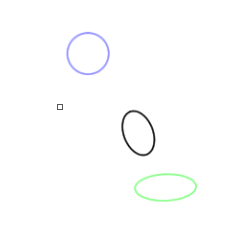
Now I’m going to draw 3 in between frames between each Keyframe, and I will space them out equally.
I draw simple circles on new layers. Two of the circles are stretched so that it shows the bounce effect before hitting the ground and bouncing back up.
This is how my timeline looks

At any point in time you can click on the play button to see your animation.
Export as Gif
Great if you’ve reached this stage, then you’re ready to export your animation!
This is as simple as going to File > Export Animation > Animated Gif